

Detailed Rotor Balancing Process
Equipment Preparation
- accelerometers, laser rpm sensor, mounting stand, software application, and additional tools.
- Connect the device to your PC using the USB interface and confirm the software installation.
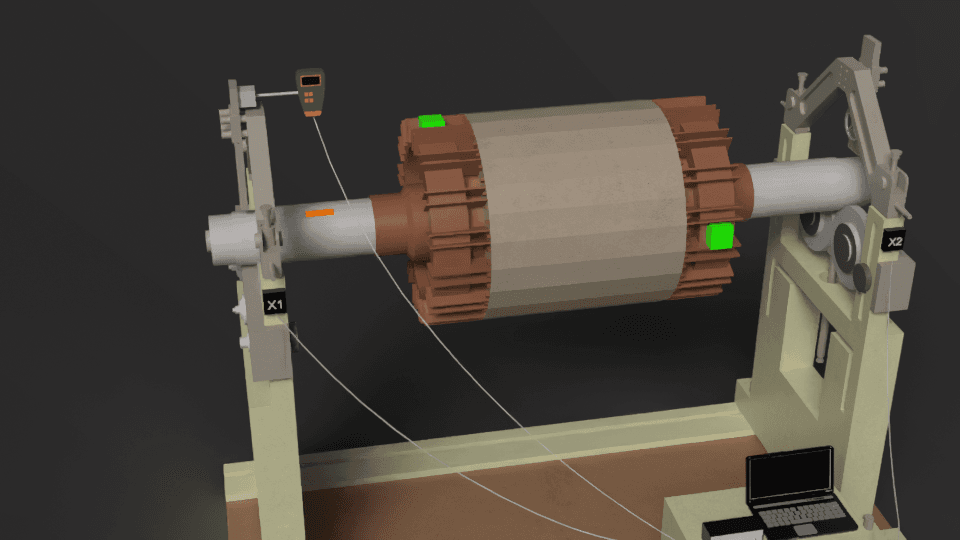
Mounting the Sensors
- Attach the vibration sensors firmly to the machine casing in areas with the highest vibration amplitude, usually close to the bearing supports.
- Direct the laser speed sensor towards the rotor and affix reflective tape to the rotor surface to facilitate phase angle measurement.
Launching the Software
- Open the Balanset application on your PC.
- Select the appropriate balancing mode: single-plane or two-plane, depending on the rotor type and your specific requirements.
Measuring Initial Vibration
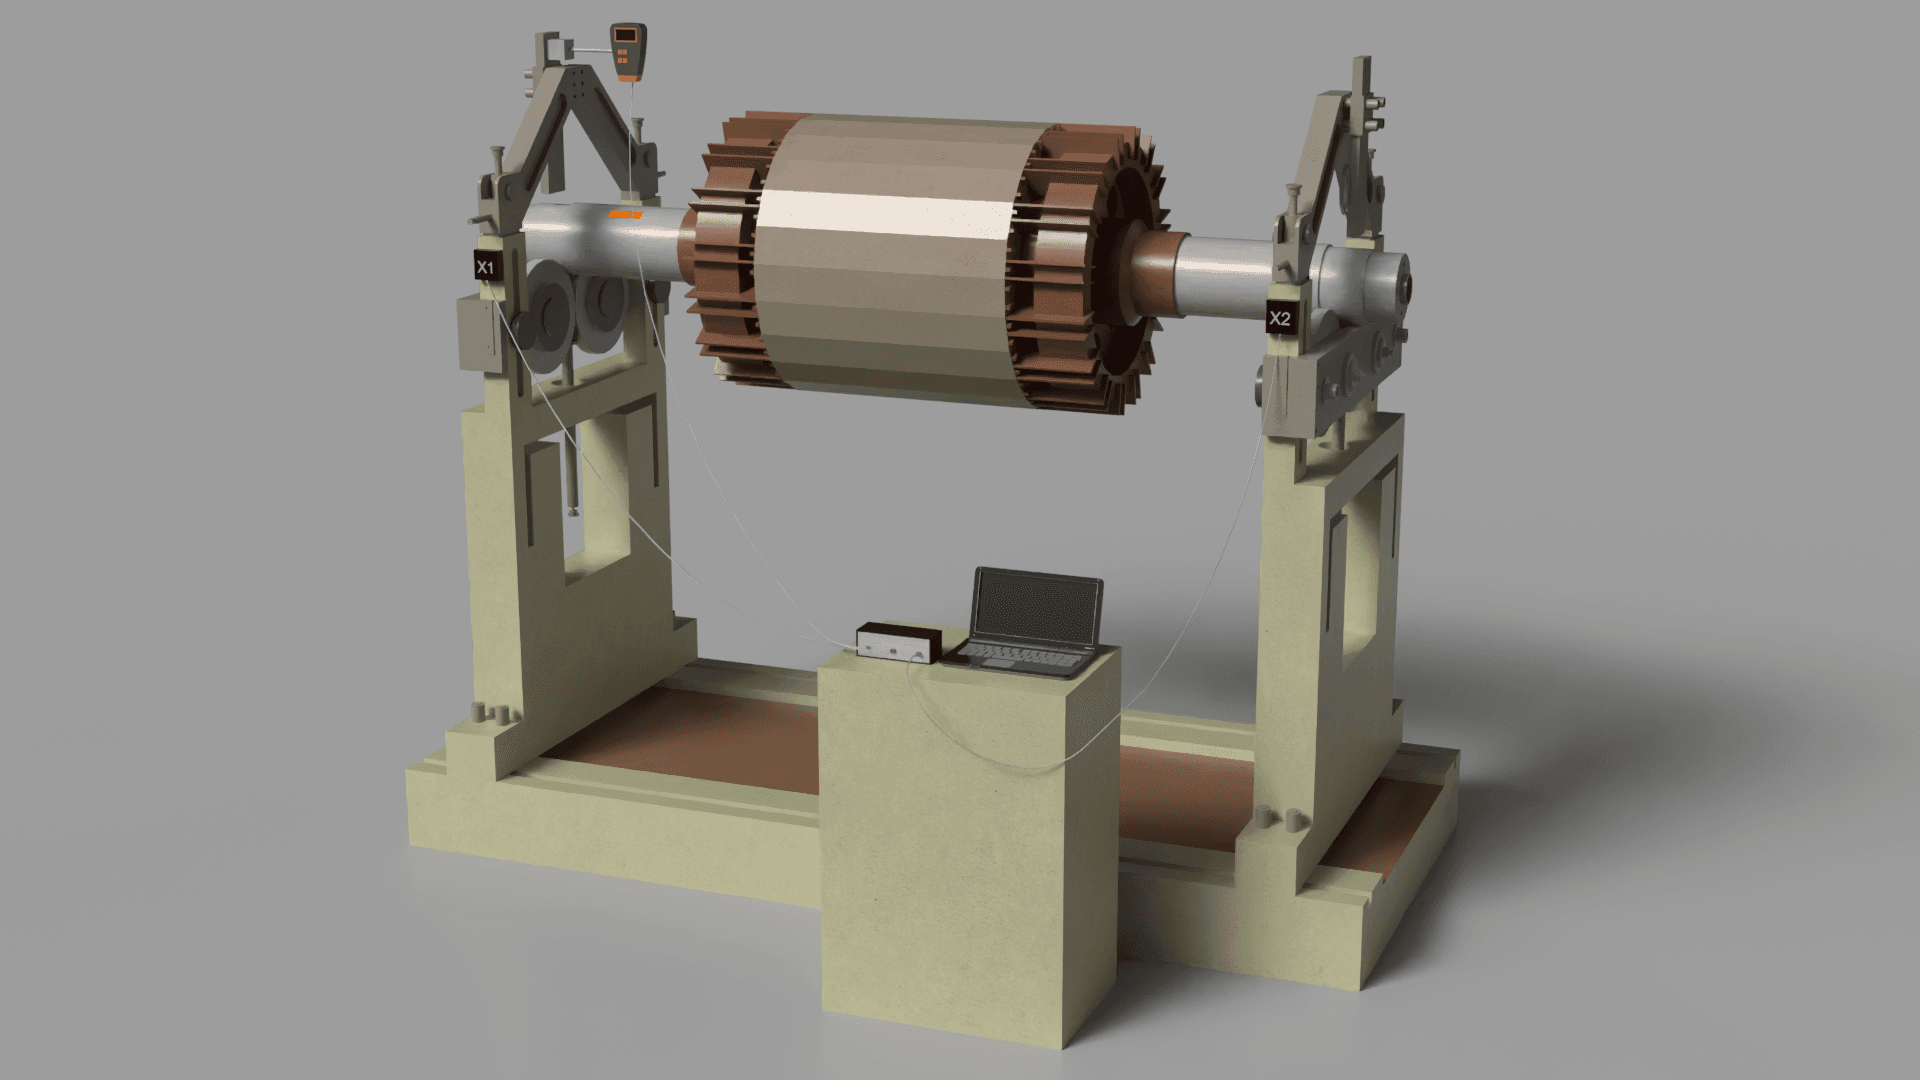
- Run the rotor up to its operating speed.
- The software will measure the vibration level, rotational speed, and phase angle. This data establishes the current imbalance condition.
Mounting the Test Weight
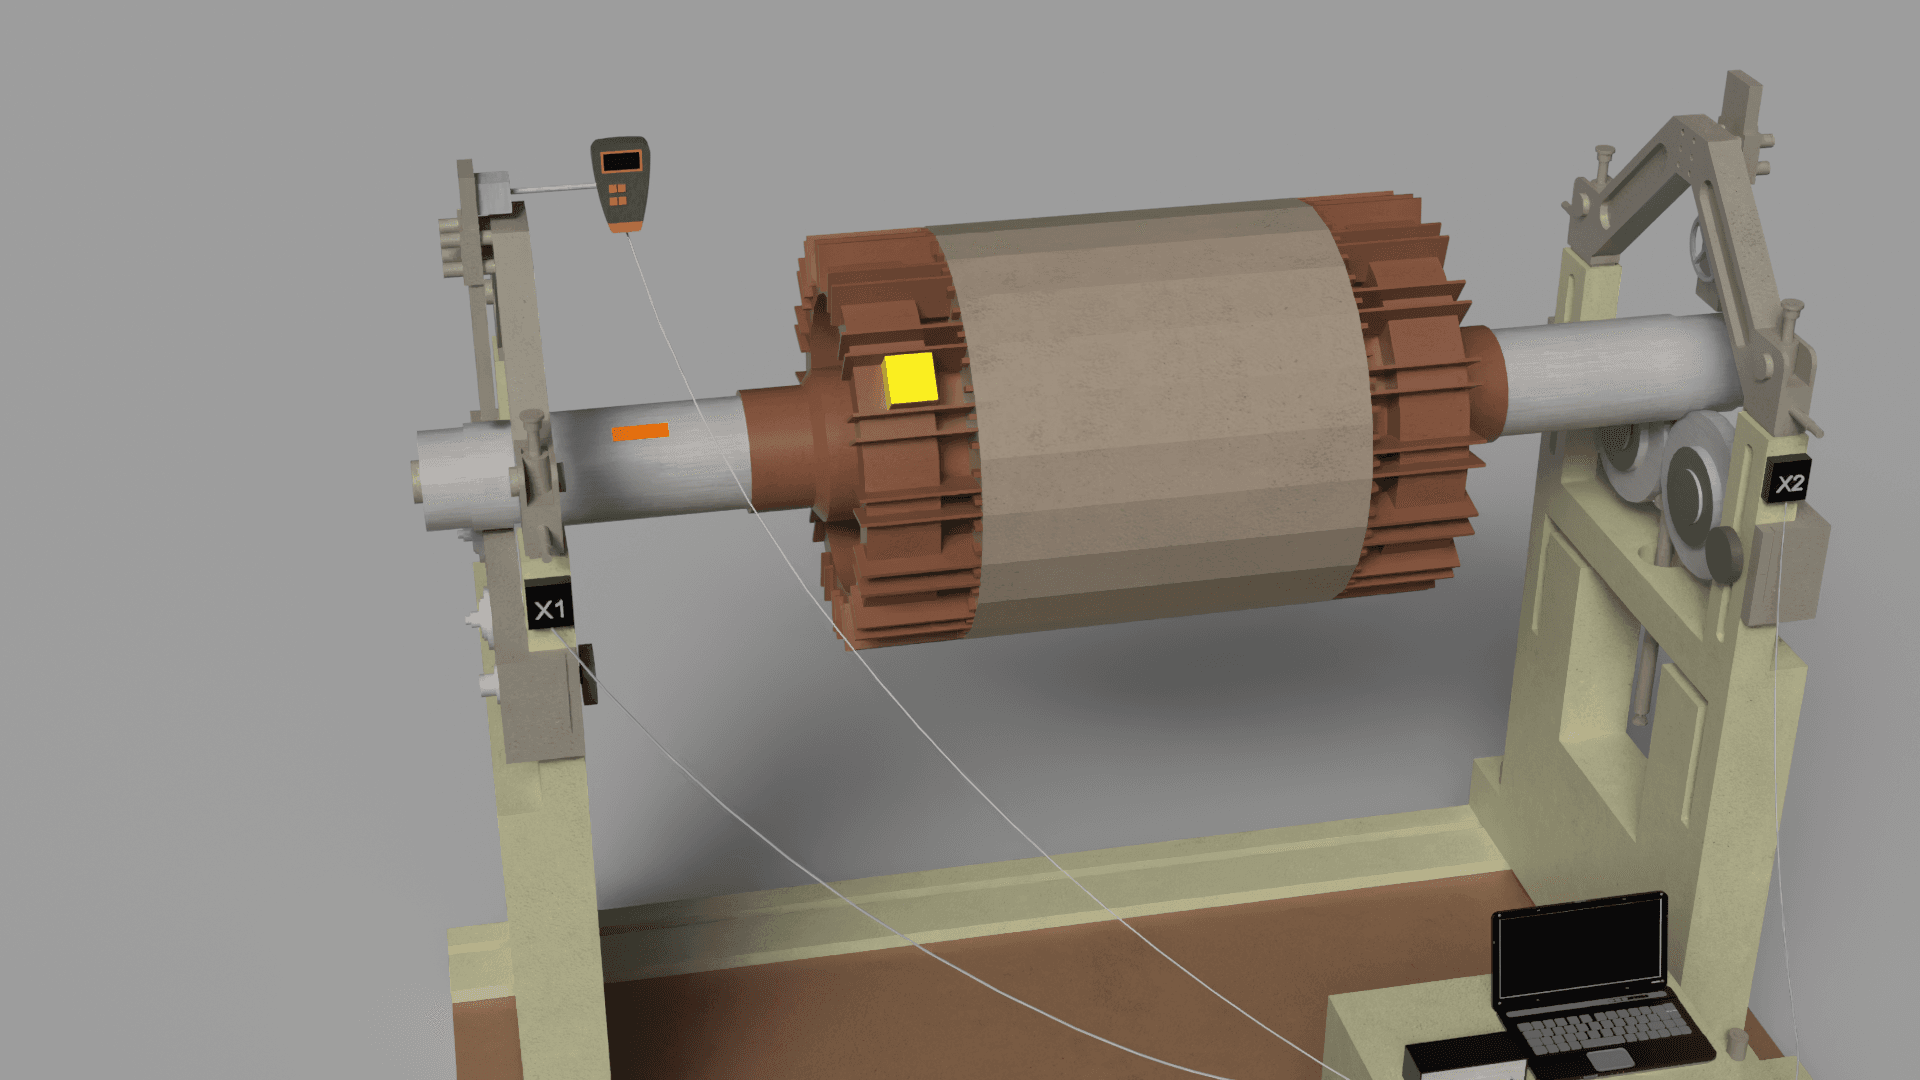
- Halt the rotation and mount a test weight at a designated position on the rotor, with the weight's value entered into the software (usually in grams).
- Resume rotor operation, and the program will capture the resulting changes in vibration amplitude and phase.
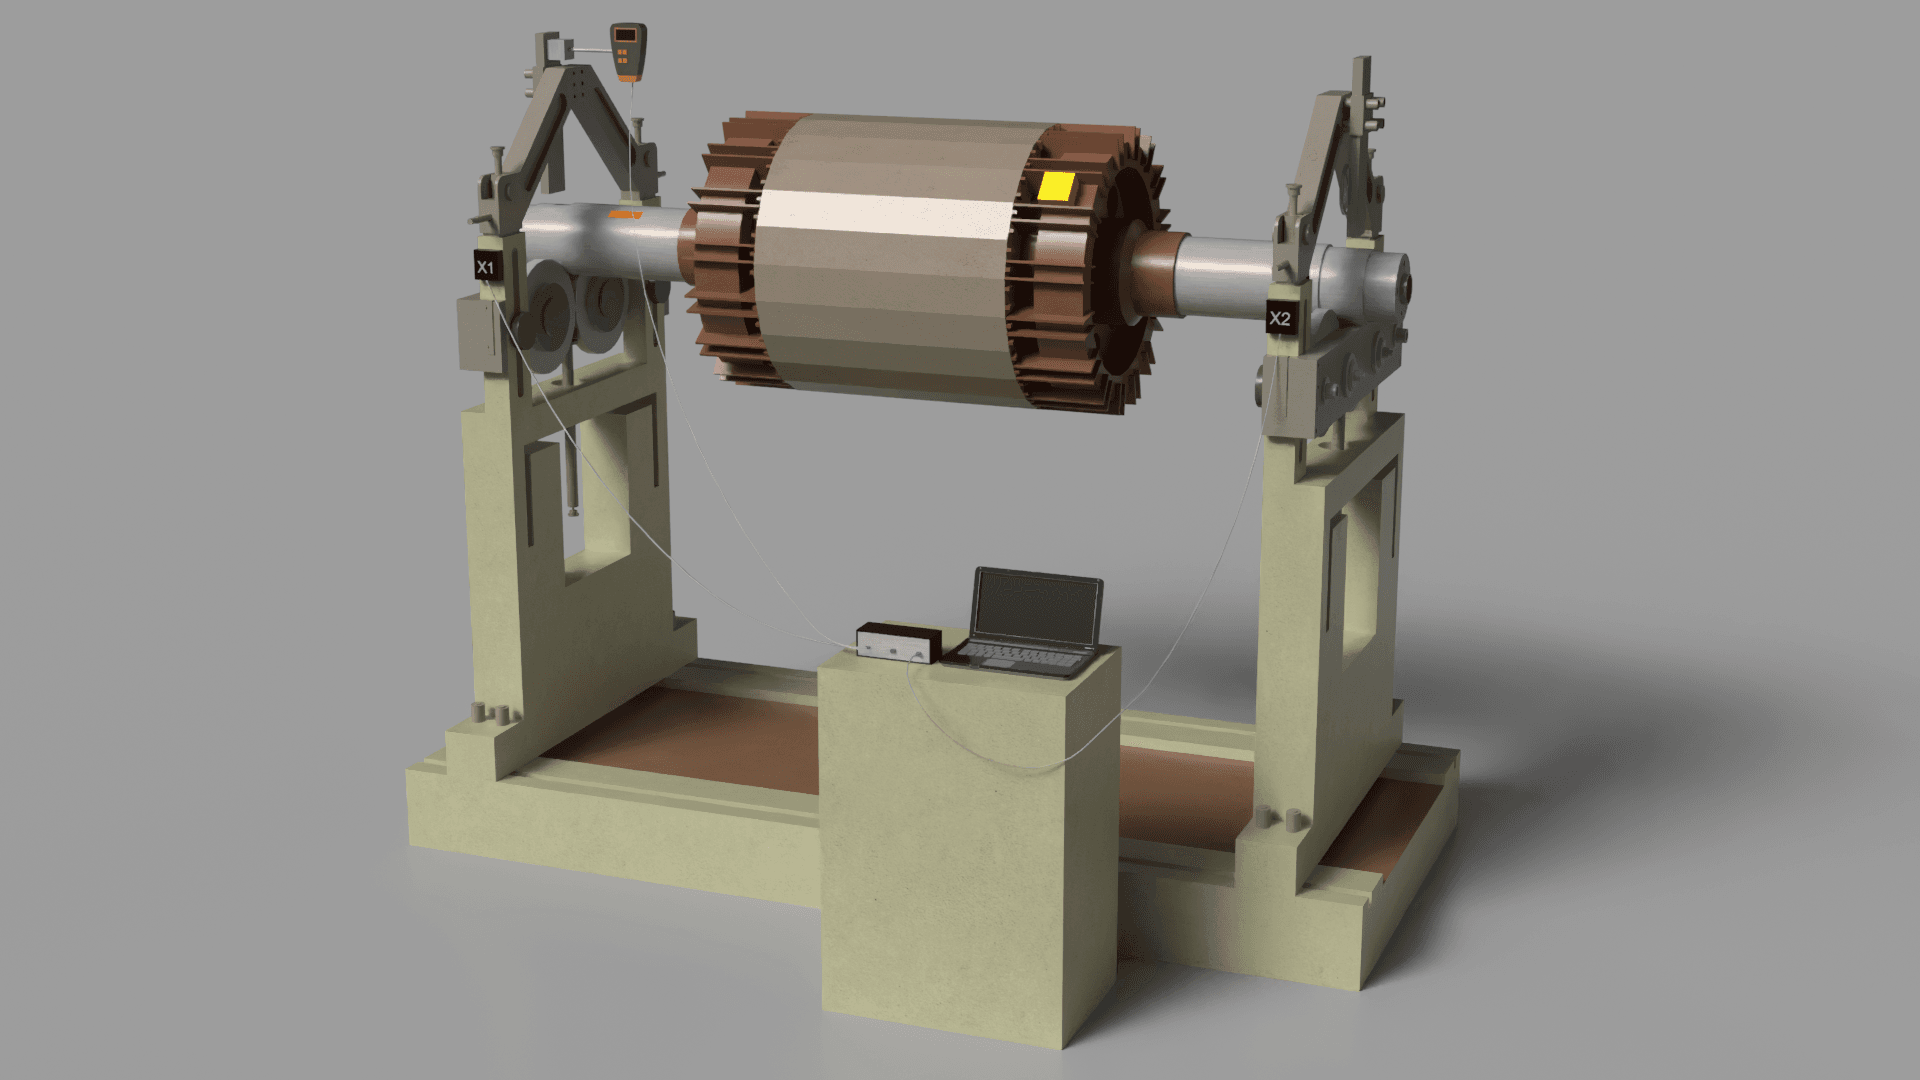
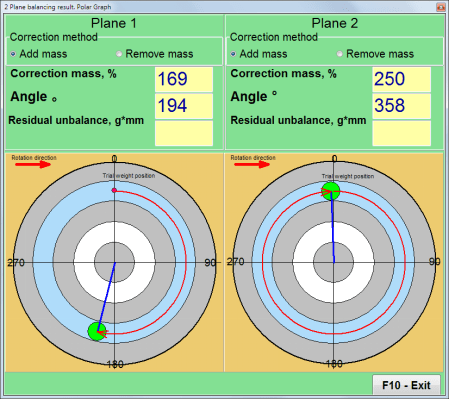
Calculating the Correction Weight
- Based on the measured data, the software automatically calculates the correction weight parameters: mass and installation angle.
- The calculated values are presented on-screen in both numerical and graphical formats.
Installing the Correction Weight
- Install the correction weight on the rotor according to the software's calculations.
- If necessary, perform intermediate checks to verify that the imbalance is being reduced.
Verification and Balancing Completion
- After installing the correction weight, run the rotor again and check the residual vibration level.
- If the measured vibration falls within the tolerance defined by ISO 1940, the balancing process is considered successful.
- If the vibration is still outside acceptable limits, reiterate the process and fine-tune the compensating weight.
Report Generation
- The program stores the balancing data, allowing you to generate and print a comprehensive report including vibration measurements, corrective weight details, and its angular placement.
Post-Balancing Checklist
- Ensure all applied weights and attached sensors are firmly fixed in their designated positions.
- Confirm that the rotor spins freely and quietly, without any unusual sounds or vibrations.
- If the rotor is part of a complex mechanism, verify the proper interaction of all its components.
Instagram: https://www.instagram.com/vibromera_ou/
Youtube : https://youtu.be/guA6XJ-ArZM?si=vmkuX7RILzKBl0zL
Our website about Field balancing
Machinio: https://www.machinio.com/listings/98380186-portable-balancer-vibration-analyzer-balanset-1a-full-kit-in-portugal
Facebook: https://www.facebook.com/marketplace/item/350151228150722
Доброго!
Долго обмозговывал как поднять сайт и свои проекты и нарастить ИКС Яндекса и узнал от крутых seo,
отличных ребят, именно они разработали недорогой и главное буст прогон Xrumer - https://www.bing.com/search?q=bullet+%D0%BF%D1%80%D0%BE%D0%B3%D0%BE%D0%BD
Xrumer для создания ссылочной стратегии помогает системно подходить к линкбилдингу. Программа размещает ссылки на форумах и блогах. Массовый прогон ускоряет рост DR. Чем больше качественных ссылок, тем выше позиции сайта. Xrumer для создания ссылочной стратегии – эффективный метод SEO.
самуэль сео, обучение созданию и продвижению сайтов бесплатно, SEO рассылки форумов
линкбилдинг что это такое, services seo, как seo оптимизировать тексты
!!Удачи и роста в топах!!
Привет всем!
Долго обмозговывал как встать в топ поисковиков и узнал от друзей профессионалов,
отличных ребят, именно они разработали недорогой и главное top прогон Xrumer - https://www.bing.com/search?q=%D1%82%D0%B0%D1%80%D0%B8%D1%84+bullet+%D0%BF%D1%80%D0%BE%D0%B3%D0%BE%D0%BD+%D1%85%D1%80%D1%83%D0%BC%D0%B5%D1%80%D0%BE%D0%BC
Xrumer для создания ссылочной стратегии помогает системно подходить к линкбилдингу. Программа размещает ссылки на форумах и блогах. Массовый прогон ускоряет рост DR. Чем больше качественных ссылок, тем выше позиции сайта. Xrumer для создания ссылочной стратегии – эффективный метод SEO.
методы сео, seo образец, Создание ссылок автоматическими прогами
Автоматическое размещение ссылок, советы по продвижения сайта, нужно продвижение сайта зачем нужно
!!Удачи и роста в топах!!
https://kozas.site
